ROUND POTATO FARMING PER ACRE
By CHETU AGROSOLUTION · 7 October 2026
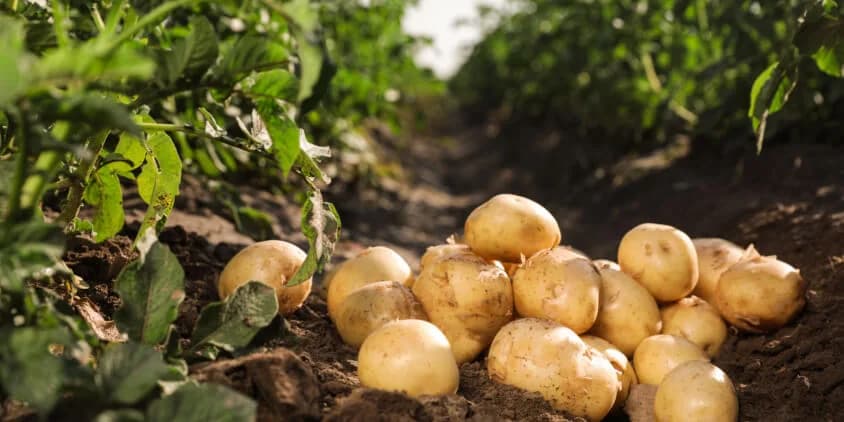
A STEP-BY-STEP GUIDE TO SEED RATE, SPACING, FERTILIZER, WATER, PESTS, DISEASES AND HARVESTING
Farmer, we at CHETU AGROSOLUTION advise you to treat round potato farming as a business that requires proper planning before planting. Round potatoes can provide both food and income, but success depends greatly on seed quality, field selection, soil preparation, proper nutrition, water management, weed control, and effective management of pests and diseases.
Tanzania has many areas suitable for round potato production, particularly cooler highland areas. TARI identifies areas such as Mbeya, Rungwe, Njombe, Makete, Mufindi, Mbinga, Sumbawanga, Uluguru, Usambara, West Kilimanjaro, Arusha, Manyara and other suitable areas as important potato-growing zones.
Therefore, we at CHETU AGROSOLUTION want to help you from the very first stage of field preparation all the way to harvesting and storage.
1. START WITH A BUSINESS PLAN
Before buying seed, ask yourself:
Are you planting for food or for commercial purposes?
Will you sell fresh potatoes or supply traders?
Where is your target market?
Which variety will you plant?
Will you use irrigation or depend on rainfall?
When will you plant so that your harvest reaches the market at the right time?
A farmer who plans the market early has a better chance of making the right decisions about seed variety, planting time and harvesting period.
Do not plant first and start looking for a market after harvesting.
2. CHOOSE THE RIGHT FARM LOCATION
Round potatoes require soil that allows roots and tubers to develop properly and drains excess water.
We recommend choosing:
Loamy or sandy-loam soil.
Fertile soil.
Land with good drainage.
An area with good air circulation.
An area with adequate water if irrigation will be used.
Land without a serious history of potato diseases.
Avoid:
Very heavy soils that retain excessive water.
Fields with a recurring history of bacterial wilt.
Round potatoes generally perform well in cooler, high-altitude environments, although suitable varieties and management can allow production under different conditions.
3. TEST YOUR SOIL BEFORE PLANTING
Farmer, do not buy fertilizer simply because you used the same fertilizer last season.
We recommend testing your soil before the season so that you can determine:
pH
Nitrogen (N)
Phosphorus (P)
Potassium (K)
Calcium (Ca)
Magnesium (Mg)
Sulphur (S)
Other nutrients that may be deficient.
Soil testing helps you develop a fertilizer program based on the actual condition of your field.
Soil pH
Round potatoes generally perform well in moderately acidic soils, although the optimum range depends on the production system and local conditions.
Do not apply lime blindly.
If the soil test shows that pH is too low, consult an agricultural professional to determine the appropriate amount of lime.
4. CHOOSE HIGH-QUALITY SEED
This is one of the steps we at CHETU AGROSOLUTION emphasize most strongly.
Poor-quality seed can force you to spend heavily on fertilizer, pesticides and labour while still producing low yields.
A good potato seed should be:
Of a variety suitable for your area.
Certified or from a reliable certified seed source.
Free from visible disease symptoms.
Free from rot.
Free from serious pest damage.
Capable of producing healthy sprouts.
Physiologically vigorous.
Of a suitable size for your production objective.
FAO guidance also emphasizes the importance of healthy, certified seed tubers, or seed from a reputable source where certified seed is not available.
5. SEED REQUIREMENT PER ACRE
Seed requirement should not be determined by kilograms alone.
It also depends on:
Seed-tuber size.
Plant spacing.
Variety.
Number of plants targeted per acre.
For seed tubers of a common planting size, approximately 35–55 mm, you may plan around:
800–1,200 kg of seed per acre
However, this is not a universal requirement.
Smaller seed tubers may require fewer kilograms, while larger tubers will require more kilograms.
Therefore, we recommend that you:
Calculate your desired plant population first, then select the appropriate seed-tuber size.
Research has shown that seed-tuber size and intra-row spacing can significantly affect plant growth, tuber number, tuber size and yield.
6. CHOOSE A POTATO VARIETY ACCORDING TO YOUR AREA AND MARKET
Different potato varieties have different characteristics.
They may differ in:
Maturity period.
Disease tolerance.
Adaptation to specific environments.
Tuber size.
Cooking or processing characteristics.
Market demand.
Therefore:
Do not choose a variety based only on its name.
Choose a variety according to:
Your location + your production conditions + your target market.
7. PRE-SPROUT THE SEED BEFORE PLANTING
We recommend preparing seed tubers properly so that they produce healthy and uniform sprouts.
Steps:
Keep seed tubers in a clean area.
Protect them from excessive heat.
Avoid harsh conditions that damage the sprouts.
Remove rotting tubers.
Remove tubers showing disease symptoms.
Avoid planting tubers with weak or severely damaged sprouts.
The goal is to have:
Short, strong and healthy sprouts, rather than long, weak and stretched sprouts.
8. PREPARE THE FIELD EARLY
For one acre:
1 acre ≈ 4,047 square metres.
Carry out the following:
Clear the field.
Remove diseased crop residues.
Remove perennial weeds.
Plough the field adequately.
Break large soil clods.
Level the field where necessary.
Ensure proper drainage.
Prepare ridges or raised beds according to your production system.
Potatoes need loose soil so that stolons and tubers can develop properly.
9. APPLY WELL-DECOMPOSED MANURE
If you have good-quality, well-decomposed farmyard manure or compost, it can help improve soil fertility and soil structure.
As a practical starting range:
5–10 tonnes per acre
may be used where appropriate, but the actual amount depends on:
Manure quality.
Soil fertility.
Soil organic matter.
Soil-test results.
Do not apply fresh manure directly to the crop.
10. PREPARE RIDGES
Round potatoes can be planted on raised ridges to:
Improve drainage.
Make planting easier.
Facilitate weeding.
Make earthing-up easier.
Provide adequate soil volume for tuber development.
A practical starting spacing is:
75–85 cm between rows
and:
25–35 cm between plants
However, spacing can be adjusted according to:
Variety.
Seed-tuber size.
Desired tuber size.
Production system.
Research has shown that the interaction between seed-tuber size and intra-row spacing can influence potato yield and quality.
11. PLANTING DEPTH
Do not plant the seed too shallow or too deep.
As a general starting guide:
6–10 cm
may be used, depending on soil type and ridge system.
The exact depth should also consider soil moisture, texture and seed size.
12. PLANT POPULATION PER ACRE
Option 1: 75 cm × 30 cm
Plant population:
4,047 ÷ (0.75 × 0.30)
≈ 17,987 plants per acre
Option 2: 80 cm × 30 cm
4,047 ÷ (0.80 × 0.30)
≈ 16,863 plants per acre
Option 3: 85 cm × 30 cm
4,047 ÷ (0.85 × 0.30)
≈ 15,871 plants per acre
Therefore, depending on your spacing, you may have approximately:
16,000–18,000 plants per acre
13. BASAL FERTILIZER
Farmer, potatoes require good nutrition, but we do not want you to apply fertilizer blindly.
The requirements for N, P and K should be determined based on:
Soil-test results.
Potato variety.
Previous crop.
Soil fertility.
Expected yield.
Fertilizer formulation.
FAO guidance emphasizes that fertilizer application should consider soil nutrient availability and that potatoes have a relatively high potassium requirement.
Practical starting example for one acre
If you do not yet have a soil-test-based recommendation, the following can be used only as a planning example, not as a universal prescription:
NPK 17-17-17: 100–150 kg/acre
SOP 0-0-50: 50–100 kg/acre, depending on potassium requirements.
CAN or Urea: amount adjusted according to the nitrogen requirement.
Do not apply every fertilizer simply because it is available. Calculate the actual nutrients supplied.
14. EXAMPLE OF FERTILIZER CALCULATION
Suppose you apply:
NPK 17-17-17 = 150 kg/acre
This provides:
N = 25.5 kg
P₂O₅ = 25.5 kg
K₂O = 25.5 kg
Then:
CAN 26% N = 40 kg/acre
This provides:
N = 10.4 kg
And:
SOP 0-0-50 = 95 kg/acre
This provides:
K₂O = 47.5 kg
Total:
N ≈ 35.9 kg/acre
P₂O₅ ≈ 25.5 kg/acre
K₂O ≈ 73 kg/acre
This is an example of how to calculate nutrients supplied by fertilizers.
It is not a universal recommendation for every farm.
The final fertilizer program should be adjusted after considering soil-test results and professional agronomic advice.
15. HOW TO APPLY BASAL FERTILIZER
Do not place seed tubers directly on concentrated fertilizer.
Follow these steps:
Make a planting furrow.
Apply the fertilizer.
Mix the fertilizer with soil.
Cover it with a thin layer of soil.
Place the seed tuber.
Cover the tuber with soil.
The seed tuber should not be in direct contact with concentrated fertilizer.
16. PLANTING
Place:
One seed tuber per planting spot
according to your selected spacing.
For example:
75 cm × 30 cm
Then cover the seed with soil.
Make sure:
Sprouts are not broken.
Rotten seed is not planted.
Soil has adequate moisture.
Water does not remain stagnant in the field.
17. IRRIGATION
Water is extremely important in potato production.
FAO notes that potatoes require relatively high soil moisture compared with some crops and that irrigation may be necessary where rainfall is insufficient. Water stress during important tuber-development stages can reduce tuber size and yield.
Avoid:
Excessive irrigation.
Severe drying of the field.
Applying a very large amount of water after a long dry period.
Large fluctuations in soil moisture can negatively affect tuber quality.
Under drip irrigation
Irrigate according to:
Soil type.
Weather.
Crop growth stage.
Rainfall.
Soil moisture.
Irrigation system capacity.
Recent research also supports adjusting irrigation frequency according to local soil and crop conditions rather than following one fixed schedule everywhere.
18. WATER MANAGEMENT ACCORDING TO CROP AGE
Weeks 1–2
The goal is to support sprouting and emergence.
Do not turn the field into mud.
Weeks 3–5
The plant begins developing roots and foliage.
Maintain adequate soil moisture.
Weeks 5–8
This is an important period for stolon formation and tuber initiation.
Avoid severe water stress.
Weeks 8–12+
This is the tuber bulking stage.
Maintain relatively stable soil moisture.
Towards maturity
Gradually reduce irrigation according to crop condition and harvesting requirements.
19. FIRST WEEDING
Carry out the first weeding early, before weeds become well established.
Weeds compete with potatoes for:
Water.
Nitrogen.
Phosphorus.
Potassium.
Light.
Space.
We therefore recommend keeping the field relatively weed-free, especially during the early stages of growth.
20. EARTHING-UP
Earthing-up is an important potato-management operation.
By adding soil around the rows, we help to:
Cover exposed tubers.
Prevent tubers from being exposed to light.
Increase the soil volume available for tuber development.
Help control weeds.
Strengthen the ridges.
First earthing-up
When plants are approximately:
15–20 cm tall.
Second earthing-up
When plants have developed further and before tubers become exposed above the soil.
Avoid damaging roots while moving soil.
21. TOP-DRESSING
If soil tests and crop condition indicate a need for additional nitrogen, CAN or Urea can be used.
Practical example:
CAN:
50–100 kg/acre over the season, split according to crop needs.
Do not apply excessive nitrogen.
Too much nitrogen can:
Encourage excessive foliage.
Delay tuber development.
Reduce nutrient-use efficiency.
Apply top-dressing when soil moisture is adequate, and avoid placing fertilizer directly against the plant stem.
22. POTASSIUM — AN IMPORTANT NUTRIENT
Farmer, do not forget potassium.
Potassium is associated with:
Tuber development.
Water-use regulation.
Tuber quality.
Tuber size.
Plant performance under stress.
FAO also highlights the potato's high demand for potassium.
Therefore:
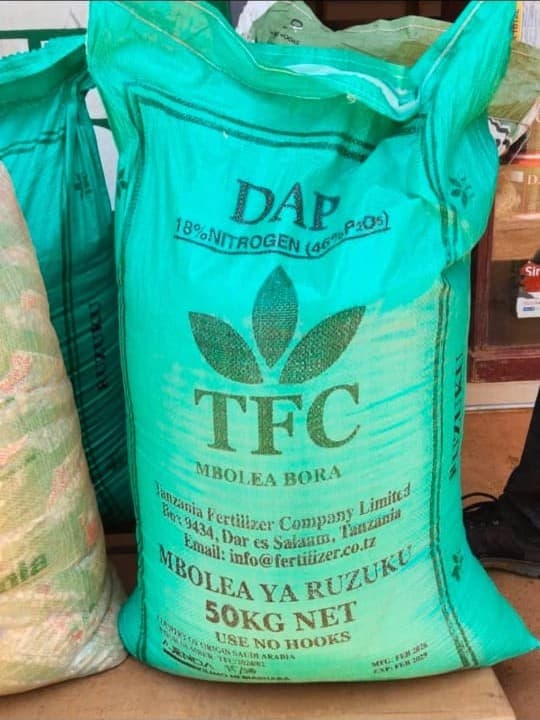
Do not rely on DAP + CAN alone every season without knowing the potassium status of your soil.
23. MAJOR POTATO DISEASES
A. Late Blight
This is one of the most important diseases of potatoes.
Symptoms may include:
Dark or brown lesions on leaves.
Rapid leaf collapse.
Tissue death.
Rapid spread under favourable humid conditions.
We recommend:
Use healthy seed.
Choose tolerant varieties where available.
Scout the field regularly.
Avoid excessive moisture.
Avoid unnecessary overhead irrigation.
Remove diseased plant residues appropriately.
Use registered fungicides when necessary and according to the product label and professional advice.
Do not wait until the whole field is infected before taking action.
24. EARLY BLIGHT
Symptoms may include:
Brown spots on leaves.
Circular or target-like lesions.
Premature leaf aging and drying.
Management includes:
Healthy seed.
Balanced nutrition.
Crop rotation.
Field sanitation.
Regular scouting.
Appropriate fungicide use when necessary.
25. BACTERIAL WILT
Bacterial wilt can be a serious problem for potato farmers.
Symptoms may include:
Wilting.
Changes in leaf appearance.
Weak plant growth.
Patches of affected plants within the field.
Prevention is more important than relying on pesticides.
We recommend:
Use certified or reliable healthy seed.
Do not plant seed from fields affected by bacterial wilt.
Practice crop rotation.
Avoid moving contaminated soil from an infected field to a clean field.
Clean farm tools.
Manage water movement from infected areas.
Remove affected plants using appropriate sanitation practices.
26. POTATO VIRUSES
Viruses can cause:
Leaf curling.
Leaf discoloration.
Stunted growth.
Reduced yields.
They may be spread through infected seed and insect vectors such as aphids.
We recommend:
Start with clean, healthy seed.
This is one of the most important preventive measures.
27. IMPORTANT POTATO PESTS
Aphids
Aphids:
Suck plant sap.
Weaken plants.
Can transmit viruses.
Scout the crop regularly.
Potato Tuber Moth
Potato tuber moth can cause serious damage, especially when tubers are exposed near the soil surface or during storage.
Prevention and management:
Carry out proper earthing-up.
Avoid leaving tubers exposed.
Control weeds.
Harvest on time.
Store potatoes properly.
Use registered insecticides when necessary and according to the label.
Cutworms
Cutworms can cut young plants close to the soil surface.
We recommend:
Proper field preparation.
Early weed control.
Regular scouting.
Appropriate control after correct identification of the pest.
Mites and Thrips
These pests can cause:
Leaf discoloration.
Plant weakening.
Reduced growth.
Do not spray simply because you see an insect.
First determine:
What pest is it? How severe is the infestation? Is treatment economically justified?
28. SCOUTING — INSPECT YOUR FIELD
Farmer, do not wait until plants begin to wilt.
We recommend inspecting the field:
At least twice per week
Check:
Leaves.
Stems.
Undersides of leaves.
Soil.
Insects.
Leaf spots.
Stunted plants.
Wilting plants.
Soil moisture.
Record areas where problems are appearing.
29. SAFE USE OF PESTICIDES
At CHETU AGROSOLUTION, we advise you not to select a pesticide simply because someone has given the disease or pest a particular name.
Before using a pesticide:
Identify the problem.
Determine whether it is caused by an insect, fungus, bacterium or virus.
Confirm the crop.
Check the active ingredient.
Read the product label.
Follow the recommended rate on the label.
Observe the pre-harvest interval (PHI).
Wear appropriate PPE.
Do not mix pesticides indiscriminately.
Pesticides are not a substitute for good seed, sanitation, crop rotation and proper water management.
30. CROP ROTATION
Do not grow potatoes on the same field every season without a rotation plan.
Rotate potatoes with crops that do not share the same major pests and diseases.
Crop rotation can help reduce the build-up of:
Soil-borne diseases.
Pests.
Certain soil problems.
FAO recommends crop rotation as part of good potato production practices to reduce the build-up of pathogens and pests.
31. REDUCING DISEASE THROUGH FIELD SANITATION
After harvesting:
Remove diseased crop residues.
Do not leave rotten potatoes around the field.
Remove volunteer potato plants.
Clean farm equipment.
Control weeds.
Avoid moving contaminated soil from infected fields to clean fields.
32. MATURITY PERIOD
Different potato varieties have different maturity periods.
Therefore:
Do not harvest based only on the calendar.
Consider:
Variety.
Days after planting.
Leaf condition.
Tuber size.
Tuber skin.
Market requirements.
Some varieties may mature in approximately 3–4 months, but not every variety will mature within this period.
33. HOW TO KNOW WHEN POTATOES ARE READY FOR HARVEST
Important signs include:
Leaves beginning to yellow.
Plant drying down.
Tubers reaching the desired size.
Tuber skin becoming firm.
Before harvesting the entire field, carry out a:
Test digging
Dig plants from several different areas of the field.
Check:
Number of tubers.
Tuber size.
Quality.
Rot.
Skin maturity.
Marketable yield.
34. HARVESTING
Avoid harvesting when the soil is excessively wet.
We recommend:
If irrigation is used, reduce irrigation as the crop approaches maturity according to crop condition.
Harvest carefully.
Avoid cutting tubers with hoes or digging tools.
Avoid throwing tubers from excessive heights.
Separate damaged tubers.
Separate rotten tubers.
Separate badly bruised tubers.
Injuries provide entry points for storage diseases and can reduce storage life and market quality.
35. CURING AND DRYING
After harvesting:
Do not leave potatoes under strong sunlight for long periods.
Keep them in a cool, shaded, well-ventilated area.
Avoid excessive heat.
Avoid washing potatoes if they are intended for longer-term storage unless you have an appropriate post-harvest handling system.
The goal is to reduce mechanical damage and rot.
36. POTATO STORAGE
Potatoes intended for storage require:
A clean storage area.
Good ventilation.
Darkness.
Appropriate humidity.
Protection from pests.
Do not store healthy potatoes together with:
Rotten potatoes.
Severely damaged potatoes.
Diseased potatoes.
37. ONE-ACRE PRODUCTION SCHEDULE
| Stage | Main activity |
|---|---|
| 4–2 weeks before planting | Soil testing and market planning |
| 3–1 weeks before planting | Field preparation |
| 2 weeks to planting | Seed preparation/pre-sprouting |
| Planting day | Plant at 75–85 cm × 25–35 cm |
| Planting | Apply basal fertilizer according to soil-test recommendations |
| Weeks 1–2 | Monitor emergence and soil moisture |
| Weeks 2–4 | Weeding and scouting |
| Weeks 3–5 | First earthing-up |
| Weeks 4–7 | Nutrient management according to crop needs |
| Weeks 5–8 | Second earthing-up |
| Weeks 5–12+ | Water, pest and disease management |
| Maturity | Reduce irrigation according to crop condition |
| Harvest | Carry out test digging first |
| After harvest | Sort, cure and store |
38. APPROXIMATE REQUIREMENTS FOR ONE ACRE
Seed
800–1,200 kg
Manure/compost
5–10 tonnes, where required and where the manure is well decomposed.
Row spacing
75–85 cm
Plant spacing
25–35 cm
Planting depth
6–10 cm
Plant population
Approximately:
16,000–18,000 plants per acre, depending on spacing.
Water
Water requirements vary significantly with climate, soil, variety and irrigation system. FAO emphasizes maintaining adequate soil moisture, especially during important tuber-development stages.
Fertilizer
Do not use one fixed fertilizer rate for every farm.
Use:
Soil test + crop requirement + fertilizer formulation + expected yield
to determine the final fertilizer program.
39. 15 COMMON MISTAKES TO AVOID
Using unreliable seed.
Planting diseased seed.
Failing to test the soil.
Planting in poorly drained soil.
Applying fertilizer based only on habit.
Ignoring potassium.
Allowing fertilizer to come into direct contact with seed tubers.
Using unsuitable plant spacing.
Delaying weeding.
Failing to earth-up.
Leaving tubers exposed to sunlight.
Over-irrigating.
Waiting until disease has spread before taking action.
Spraying pesticides without identifying the problem.
Harvesting and storing damaged tubers together with healthy tubers.
40. OUR ADVICE TO FARMERS
Farmer, we at CHETU AGROSOLUTION advise you not to start potato production simply by buying seed and fertilizer.
Start with:
Market → Location → Soil test → Variety → Quality seed → Field preparation → Spacing → Fertilizer → Water → Scouting → Pest and disease management → Harvesting → Storage → Market.
Every stage affects the next stage.
Good potatoes begin with:
Good seed + good soil preparation + good crop management.
Not pesticides alone.
41. CHETU AGROSOLUTION IS HERE TO SUPPORT YOU
We at CHETU AGROSOLUTION can support you with:
Seed selection.
Fertilizer selection.
Selection of appropriate crop-protection products.
Advice on proper input use.
Identification of farm problems.
Crop-management advice at different growth stages.
Crop nutrition planning.
Pest and disease-management guidance.
And other agricultural-input needs.
For more information and agricultural support, visit CHETU AGROSOLUTION at chetuagro.com.
CHETU AGROSOLUTION
Better Inputs, Better Harvests, Better Lives.
Farmer, do not wait until a problem becomes serious before seeking professional advice.
Let us work together from field preparation all the way to harvest.