RICE FARMING PER ACRE
By CHETU AGROSOLUTION · 7 October 2026
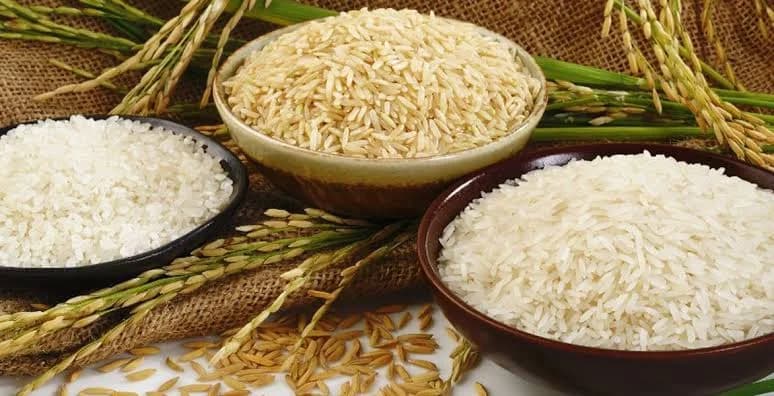
A STEP-BY-STEP GUIDE, SEED RATES, SPACING, FERTILIZER, WATER MANAGEMENT, PESTS, DISEASES AND HARVESTING
At CHETU AGROSOLUTION, we believe that successful rice farming starts with proper planning and continues with disciplined crop management from seed selection to harvesting and post-harvest handling.
Rice is an important food and commercial crop in Tanzania. However, good yields do not come from planting rice alone. Farmers need to pay attention to variety selection, quality seed, nursery management, land preparation, spacing, fertilizer management, water management, weed control, pest and disease management, harvesting and post-harvest handling.
In this guide, we take you step by step through rice production on one acre, including practical measurements and fertilizer calculations.
Important: Fertilizer rates and other crop-management recommendations are not universal. They should be adjusted according to soil-test results, variety, water availability, production system, expected yield, fertilizer formulation and local agronomic recommendations.
1. START WITH THE MARKET
Before preparing your farm, we advise you to ask yourself:
Which rice variety is preferred by buyers in your area?
Who will buy your rice?
What grain quality does the market demand?
Is the rice intended for household consumption or commercial production?
What is the expected selling period?
What are the costs of seed, fertilizer, pesticides, labor, irrigation, harvesting, drying, transport and milling?
At CHETU AGROSOLUTION, we encourage farmers to think about the market before planting, rather than waiting until harvest to search for buyers.
2. CHOOSE A SUITABLE RICE VARIETY
TARI lists rice varieties
However, the best variety depends on your location, water conditions, maturity period, grain characteristics, disease and pest pressure, and market demand. TARI currently lists these among its rice seed products.
We advise farmers to use quality, certified or properly verified seed rather than seed of unknown quality.
Do not select a variety simply because another farmer obtained a good harvest from it. Your soil, water availability, climate, management practices and market may be different.
3. HOW MUCH SEED IS NEEDED FOR ONE ACRE?
For commercial rice production using nursery raising and transplanting, a general guide is approximately:
20–30 kg of seed per hectare
This is approximately:
8–12 kg of seed per acre
The exact amount depends on the production system, variety, seed quality and planting method.
TARI/IRRI guidance notes that higher seed rates can produce thin and weak seedlings, while commercial rice production may use approximately 20–30 kg/ha.
For direct seeding, do not automatically use the same seed rate as transplanting. Direct-seeded rice requires a different seed-rate calculation.
4. SOIL TESTING — DO THIS BEFORE APPLYING FERTILIZER
One of the biggest mistakes farmers make is applying fertilizer simply because another farmer is using it.
At CHETU AGROSOLUTION, we recommend that you first determine the condition of your soil.
A soil test can help determine:
Soil pH
Nitrogen status
Phosphorus status
Potassium status
Other important nutrients
General soil fertility condition
TARI provides soil, plant and climate testing services to help determine fertility levels and suitable production decisions.
Why soil testing matters
Two rice fields located in the same village may require different fertilizer programs.
One field may have sufficient phosphorus while another may be deficient. One may have adequate potassium while another may require additional potassium.
Therefore:
Do not copy another farmer's fertilizer program without understanding your own field.
5. CHOOSE THE RIGHT FARM SITE
Rice performs best where there is reliable access to water and where water can be managed effectively.
A suitable field should have:
Reliable water availability
Good water-control structures
Soil capable of holding water
Good access to the farm
Adequate sunlight
Proper drainage
Low risk of uncontrolled flooding
If the field is in an irrigation scheme, understand the water-delivery schedule before planting.
Water management is one of the important areas supported by Tanzania's rice-development programs.
6. LAND PREPARATION
Prepare the field thoroughly before transplanting.
Step 1: Clear the field
Remove:
Previous crop residues where necessary
Large weeds
Bushes
Unwanted plants
Step 2: Plough the field
Plough sufficiently to loosen the soil and incorporate appropriate organic materials and residues.
Step 3: Puddle the soil where the production system requires it
Puddling helps create a suitable planting environment for transplanted rice.
Step 4: Level the field
Good leveling is extremely important.
An uneven field can result in:
Some areas having too much water
Other areas becoming dry
Uneven fertilizer use
Uneven plant growth
Increased weed problems
Difficulty managing irrigation
TARI/NAFAKA rice training materials emphasize puddling and proper leveling before transplanting.
7. PREPARE THE NURSERY
The nursery should preferably be:
Close to the main field
Near a reliable water source
On fertile soil
Free from excessive weeds
Protected from livestock and other animals
For wet-bed nurseries, pregerminated seed is sown on prepared nursery beds.
TARI/NAFAKA guidance describes nursery-bed preparation, leveling, pregerminated seed placement and careful water management during seedling establishment.
8. SEED PREPARATION
Before sowing:
Step 1: Sort the seed
Remove:
Broken seed
Immature seed
Discolored seed
Damaged seed
Foreign materials
Step 2: Soak the seed
Use clean water and follow an appropriate soaking procedure for the chosen production method.
Step 3: Incubate the seed
Allow the seed to begin germinating under suitable conditions.
Step 4: Sow pregerminated seed
Pregerminated seed should be distributed evenly over the prepared nursery bed.
Current TARI/IRRI guidance describes soaking, incubation and sowing of pregerminated rice seed in wet-bed nurseries.
9. NURSERY SEED RATE
For wet-bed nurseries, TARI/IRRI guidance gives approximately:
50–75 g of seed per square metre
The nursery should be managed carefully so seedlings do not become excessively crowded.
Overcrowding can result in:
Thin seedlings
Weak seedlings
Poor root development
Increased competition
Greater transplanting stress
Keep the nursery moist rather than continuously flooded during early establishment, following the appropriate nursery system.
10. NURSERY WATER MANAGEMENT
Immediately after sowing:
Keep the nursery adequately moist.
Avoid unnecessary flooding during early seedling establishment.
As seedlings develop, adjust water levels according to their growth and the nursery system.
Remove weeds early.
The TARI/NAFAKA training protocol describes gradual water management in the nursery, with water levels adjusted according to seedling height.
11. TRANSPLANTING
Transplant only healthy and vigorous seedlings.
For conventional line transplanting, TARI/NAFAKA guidance describes:
20 cm × 20 cm spacing
and approximately:
2–3 seedlings per hill
with planting depth of approximately:
3 cm
Spacing can be adjusted depending on soil fertility and water availability.
12. SRI RICE PRODUCTION
Another production approach is the System of Rice Intensification (SRI).
SRI practices can include:
Younger seedlings
One seedling per hill
Wider spacing
Careful water management
Early and regular weed control
A commonly used SRI spacing is:
25 cm × 25 cm
Under SRI, one seedling per hill is commonly used.
However, we emphasize that one seedling per hill should not be presented as a universal requirement for all rice farmers. It is specifically associated with the SRI approach.
13. CALCULATING PLANTING POSITIONS PER ACRE
One acre is approximately:
4,047 square metres
At 20 cm × 20 cm spacing:
Each planting position occupies 0.04 m².
Approximately 101,175 planting positions can theoretically fit in one acre.
At 25 cm × 25 cm spacing:
Each planting position occupies 0.0625 m².
Approximately 64,752 planting positions can theoretically fit in one acre.
These are theoretical calculations. Actual field numbers can be lower because of:
Paths
Bunds
Drainage channels
Irrigation structures
Field shape
Missing areas
14. FERTILIZER MANAGEMENT
Rice requires several nutrients, especially:
Nitrogen (N)
Phosphorus (P)
Potassium (K)
However, fertilizer application should be based on:
Soil-test results
Variety
Production system
Expected yield
Soil fertility
Water availability
Previous crop
Fertilizer formulation
TARI/NAFAKA training materials give a general nutrient guide of approximately:
120 kg N/ha
40 kg P₂O₅/ha
40 kg K₂O/ha
Converted to one acre, this is approximately:
48.6 kg N/acre
16.2 kg P₂O₅/acre
16.2 kg K₂O/acre
These figures are a general guide, not a universal fertilizer prescription.
15. UNDERSTANDING FERTILIZER CALCULATIONS
Farmers often confuse the amount of nutrient required with the amount of fertilizer product required.
For example, suppose your soil-based recommendation requires:
16.2 kg of P₂O₅ per acre
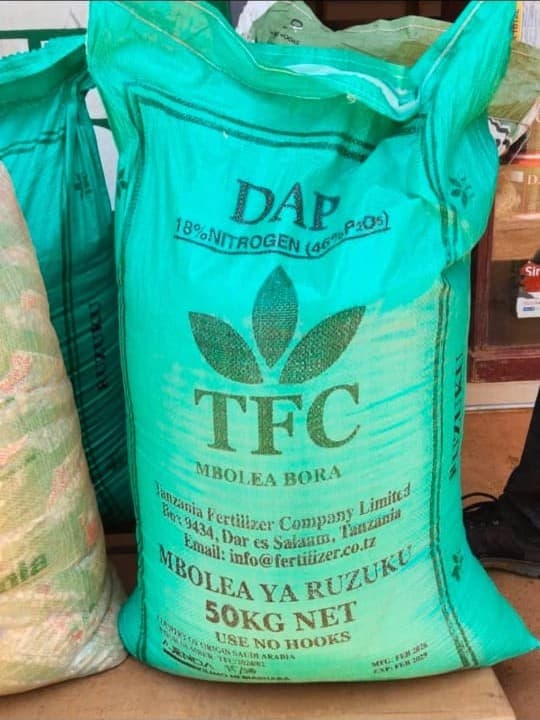
If you use DAP containing:
18% N and 46% P₂O₅
The approximate amount of DAP required to supply 16.2 kg P₂O₅ is:
16.2 ÷ 0.46 = 35.2 kg DAP
That 35.2 kg of DAP also supplies approximately:
35.2 × 0.18 = 6.34 kg N
If the total target is 48.6 kg N, the remaining nitrogen requirement would be approximately:
48.6 − 6.34 = 42.26 kg N
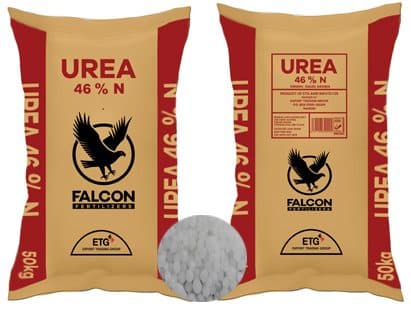
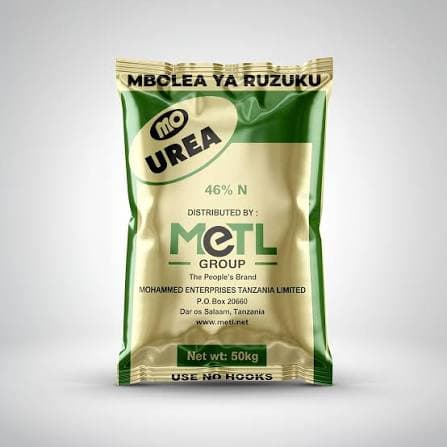
If Urea contains 46% N:
42.26 ÷ 0.46 ≈ 91.9 kg Urea
For potassium:
If the target is 16.2 kg K₂O and SOP contains 50% K₂O:
16.2 ÷ 0.50 = 32.4 kg SOP
Therefore, as a mathematical example only, the fertilizer quantities would be approximately:
35 kg DAP
92 kg Urea
32 kg SOP
Important
This does not mean every one-acre rice field should automatically receive these exact amounts.
Your actual fertilizer program should be determined from the soil condition, fertilizer formulation and crop requirements.
16. WHEN SHOULD FERTILIZER BE APPLIED?
Do not apply all nitrogen at once.
Nitrogen should generally be split into several applications so the crop can use it efficiently.
A practical program may include:
Basal application
Apply the recommended phosphorus and potassium fertilizer before or around transplanting, depending on the soil-test recommendation and fertilizer type.
First nitrogen application
Apply a portion of the recommended nitrogen after establishment.
Second nitrogen application
Apply another portion around active vegetative growth or approaching panicle initiation, depending on the crop-development stage and local recommendation.
Avoid applying nitrogen immediately before heavy rainfall or when fertilizer may be washed away.
TARI/NAFAKA guidance also recommends splitting nitrogen rather than applying the entire amount at once.
17. ORGANIC MANURE AND COMPOST
Well-decomposed manure or compost can contribute organic matter and nutrients.
Where manure is available:
Use properly decomposed material.
Avoid fresh manure that can damage seedlings or create management problems.
Incorporate it appropriately during land preparation.
Consider its nutrient contribution when designing the fertilizer program.
The amount required depends on manure quality, soil condition and production system.
Therefore, do not treat one manure rate as universally correct for every field.
18. WATER MANAGEMENT
Rice needs adequate water, but this does not mean the crop must remain continuously flooded throughout the entire season.
Good water management means:
Maintain adequate soil moisture.
Avoid unnecessary water stress.
Avoid uncontrolled flooding.
Maintain good field leveling.
Ensure drainage when necessary.
Pay special attention to water availability during sensitive crop stages.
Some improved rice-management systems, including SRI, use intermittent irrigation rather than continuous flooding.
At CHETU AGROSOLUTION, we advise farmers to manage water according to:
Soil type
Variety
Crop stage
Irrigation infrastructure
Weather
Field drainage
19. WEED MANAGEMENT
Weeds compete with rice for:
Water
Nutrients
Light
Space
They can significantly reduce crop performance if not controlled early.
Weed-control options include:
Proper land preparation
Good field leveling
Timely hand weeding
Mechanical weeding
Appropriate herbicides
Integrated weed management
When using herbicides:
Identify the weed first.
Use a product registered for the intended crop/use.
Follow the label.
Use the correct rate.
Calibrate the sprayer.
Wear appropriate PPE.
Observe pre-harvest intervals.
Avoid unnecessary mixtures.
Do not spray a herbicide simply because another farmer used it.
20. COMMON RICE PESTS
Scout your field regularly for pests such as:
1. Rice stem borers
Symptoms may include:
Dead hearts
White heads
Damaged stems
Poor panicle development
2. Rice bugs
These can damage developing grains and reduce grain quality.
3. Rice hispa
Adults and larvae can damage leaves.
4. Aphids and other sucking pests
These can weaken plants and may contribute to the spread of some plant pathogens.
5. Birds
Bird damage can become serious during grain filling and maturity.
6. Other insect pests
Pest pressure varies by location, season and crop stage.
21. DISEASES OF RICE
Important rice diseases can include:
Rice blast
Bacterial leaf blight
Sheath blight
Sheath rot
Brown spot
False smut
Seedling diseases
Do not automatically assume that every yellow, brown or drying leaf is caused by a disease.
Similar symptoms may result from:
Nutrient deficiency
Water stress
Root problems
Insect damage
Herbicide injury
Poor soil conditions
Therefore:
Diagnose first, treat second.
TARI conducts research and provides technologies related to crop pest and disease management.
22. FIELD SCOUTING
At CHETU AGROSOLUTION, we recommend regular field scouting.
Inspect the farm at least:
Twice per week
During periods of high pest or disease pressure, inspect more frequently.
Check:
Leaves
Stems
Roots where possible
Tillers
Panicles
Grain
Water level
Weed pressure
Signs of pests
Disease symptoms
Do not wait until the whole field is affected.
23. INTEGRATED PEST AND DISEASE MANAGEMENT
Do not depend only on pesticides.
Use an integrated approach involving:
Quality seed
Suitable varieties
Proper spacing
Balanced nutrition
Field sanitation
Good water management
Timely weeding
Crop rotation where appropriate
Regular scouting
Biological and cultural methods where applicable
Appropriate pesticides when necessary
When pesticides are needed:
Use registered products.
Follow the label.
Use the correct rate.
Wear PPE.
Observe the pre-harvest interval.
Rotate modes of action where appropriate.
Avoid unnecessary pesticide mixtures.
24. FLOWERING AND PANICLE DEVELOPMENT
The flowering and grain-development stages are critical.
At this stage:
Avoid severe water stress.
Monitor pests.
Monitor diseases.
Avoid excessive nitrogen.
Maintain balanced nutrition.
Keep the field reasonably weed-free.
Poor management during flowering and grain filling can reduce final yield and grain quality.
25. LODGING MANAGEMENT
Lodging occurs when rice plants bend or fall over.
It can be encouraged by:
Excessive nitrogen
Weak varieties
High plant density
Strong winds
Heavy rain
Poor water management
To reduce lodging:
Use suitable varieties.
Avoid excessive nitrogen.
Maintain appropriate spacing.
Maintain balanced nutrition.
Manage water properly.
26. HARVESTING
Harvest at the appropriate maturity stage.
Signs of maturity include:
Most grains have developed.
Panicles change color.
Grains become firm.
The crop begins to dry naturally.
Avoid harvesting too early because immature grain can reduce quality.
Avoid harvesting too late because it can increase:
Grain shattering
Bird damage
Lodging
Weather-related losses
27. DRYING THE RICE
After harvesting:
Thresh carefully.
Remove foreign materials.
Dry the grain properly.
Avoid contamination.
Protect grain from rain.
Avoid storing grain with excessive moisture.
Proper drying is critical for maintaining grain quality.
28. STORAGE
Before storage:
Make sure the grain is adequately dry.
Clean the storage area.
Protect against rodents.
Protect against insects.
Prevent moisture from entering.
Inspect stored grain regularly.
Good post-harvest management reduces losses and helps farmers maintain market quality. TARI identifies storage, processing and value addition as important components of reducing post-harvest losses and improving competitiveness.
29. RICE MILLING
After drying and proper storage, rice can be milled.
Good milling management helps reduce:
Broken grains
Excessive losses
Contamination
Poor appearance
Farmers should also consider the market preference for:
Milled rice
Brown rice
Premium grain
Packaged rice
Other value-added rice products
30. ONE-ACRE RICE FARMING SCHEDULE
STAGE 1: MARKET AND FARM PLANNING
Before planting
Identify the market.
Select a suitable variety.
Estimate production costs.
Arrange quality seed.
Test the soil.
Plan water availability.
Prepare a pest and disease management strategy.
STAGE 2: LAND PREPARATION
Approximately 2–4 weeks before transplanting
Clear the field.
Plough.
Incorporate suitable organic matter.
Puddle where appropriate.
Level the field.
Prepare irrigation and drainage channels.
STAGE 3: NURSERY
Nursery establishment
Prepare the nursery.
Select quality seed.
Soak and incubate seed.
Sow pregerminated seed.
Maintain moisture.
Control weeds.
Monitor pests and diseases.
TARI/IRRI guidance recommends careful nursery management and notes that high seed rates can produce weaker seedlings.
STAGE 4: TRANSPLANTING
Prepare planting lines.
Maintain uniform spacing.
Transplant healthy seedlings.
Avoid burying seedlings too deeply.
Replace missing hills within the appropriate period.
Manage water carefully after transplanting.
For conventional line transplanting, 20 × 20 cm and 2–3 seedlings per hill are described in TARI/NAFAKA training material.
STAGE 5: EARLY CROP ESTABLISHMENT
First 1–3 weeks after transplanting
Monitor:
Seedling establishment
Missing hills
Weeds
Water level
Insects
Disease symptoms
Carry out timely gap filling where necessary.
STAGE 6: VEGETATIVE GROWTH
Focus on:
Nitrogen management
Weed control
Water management
Pest scouting
Disease monitoring
Do not apply fertilizer blindly.
STAGE 7: PANICLE INITIATION
This is a critical stage.
Pay attention to:
Water availability
Balanced nutrition
Pest control
Disease monitoring
Apply the appropriate split fertilizer according to your soil-based recommendation.
STAGE 8: FLOWERING
During flowering:
Avoid severe water stress.
Monitor pests.
Monitor diseases.
Maintain appropriate nutrition.
Avoid unnecessary pesticide applications.
STAGE 9: GRAIN FILLING
Monitor:
Water
Birds
Rice bugs
Diseases
Lodging
Grain development
STAGE 10: MATURITY
Gradually prepare for harvesting.
Reduce unnecessary irrigation where appropriate.
Monitor grain maturity.
Prepare harvesting equipment.
Arrange labor.
Arrange drying facilities.
Arrange transportation.
STAGE 11: HARVESTING
Harvest when the crop reaches the appropriate maturity stage.
Avoid unnecessary delays.
STAGE 12: POST-HARVEST
Thresh.
Clean.
Dry.
Store properly.
Mill where appropriate.
Grade and package.
Search for the best market.
31. SUMMARY OF IMPORTANT ONE-ACRE MEASUREMENTS
| Item | Indicative guide |
|---|---|
| Farm size | 1 acre ≈ 4,047 m² |
| Seed for commercial transplanting | Approx. 8–12 kg/acre |
| Nursery seed rate | Approx. 50–75 g/m² |
| Conventional transplanting spacing | 20 × 20 cm |
| Conventional seedlings/hill | 2–3 |
| Conventional transplanting depth | Approx. 3 cm |
| SRI spacing | 25 × 25 cm |
| SRI seedlings/hill | Commonly 1 |
| General nutrient guide | 120 kg N + 40 kg P₂O₅ + 40 kg K₂O/ha |
| Equivalent per acre | Approx. 48.6 kg N + 16.2 kg P₂O₅ + 16.2 kg K₂O |
These figures should be treated as guidelines rather than universal prescriptions. Soil tests and local agronomic recommendations should determine the final program.
32. TWENTY COMMON MISTAKES TO AVOID
Planting without a market plan.
Using poor-quality seed.
Using the wrong variety for the area.
Failing to test the soil.
Applying fertilizer blindly.
Applying all nitrogen at once.
Overcrowding the nursery.
Using weak seedlings.
Transplanting too deeply.
Using irregular spacing.
Poor land leveling.
Poor water management.
Delaying weed control.
Spraying pesticides without diagnosis.
Using the wrong pesticide.
Ignoring pesticide label instructions.
Failing to scout the field.
Harvesting too early.
Harvesting too late.
Poor drying and storage.
33. HOW CHETU AGROSOLUTION CAN SUPPORT YOU
At CHETU AGROSOLUTION, we do not want farmers to buy agricultural inputs blindly.
We want to help you make better production decisions.
We can support you with:
Quality agricultural inputs
Seeds
Fertilizers
Crop-protection products
Agronomic advice
Pest and disease identification support
Crop-management guidance
Farm monitoring
Solutions to production challenges
Agricultural input delivery
We encourage you to seek professional advice before selecting fertilizers or crop-protection products, especially where symptoms are unclear.
34. FINAL MESSAGE TO THE FARMER
Rice farming can become a productive commercial activity when it is managed as a complete production system.
Do not focus only on fertilizer.
Think about the entire chain:
Quality seed → suitable variety → soil testing → proper nursery → good land preparation → correct spacing → balanced nutrition → effective water management → timely weed control → pest and disease scouting → proper harvesting → drying → storage → marketing.
At CHETU AGROSOLUTION, our goal is to help you move from simply planting rice to managing your rice farm professionally.
For agricultural inputs, seeds, fertilizers, crop-protection solutions, technical advice and support in solving production challenges, contact CHETU AGROSOLUTION.
Pembejeo Bora, Mavuno Bora, Maisha Bora.